The Nine user guide
 By Joel White on 27th Nov 2020
There are two types of people in the world: Those who read instructions, and those who do not.
As someone who has never read instructions, writing for yourself, someone who clearly does read the instructions, I hope this is… what a user guide is supposed to look like?
Either way, this blog post should cover everything you need to know to set up your online store on Nine.
It’s not very long because it really is so simple.
Create an account
Creating a Nine account is incredibly simple- you don’t even need a password. All you need to do is enter your email address and we’ll send you an authentication code. This means that your business is as secure as possible.

Once you’re in, you’ll need to give your store a name and we will generate a Nine URL (which you can drop anywhere!)
Select your country, currency, add a support email and you are good to go.
Customise your store
Once you’ve created your account, it’s time to put your own stamp on it.
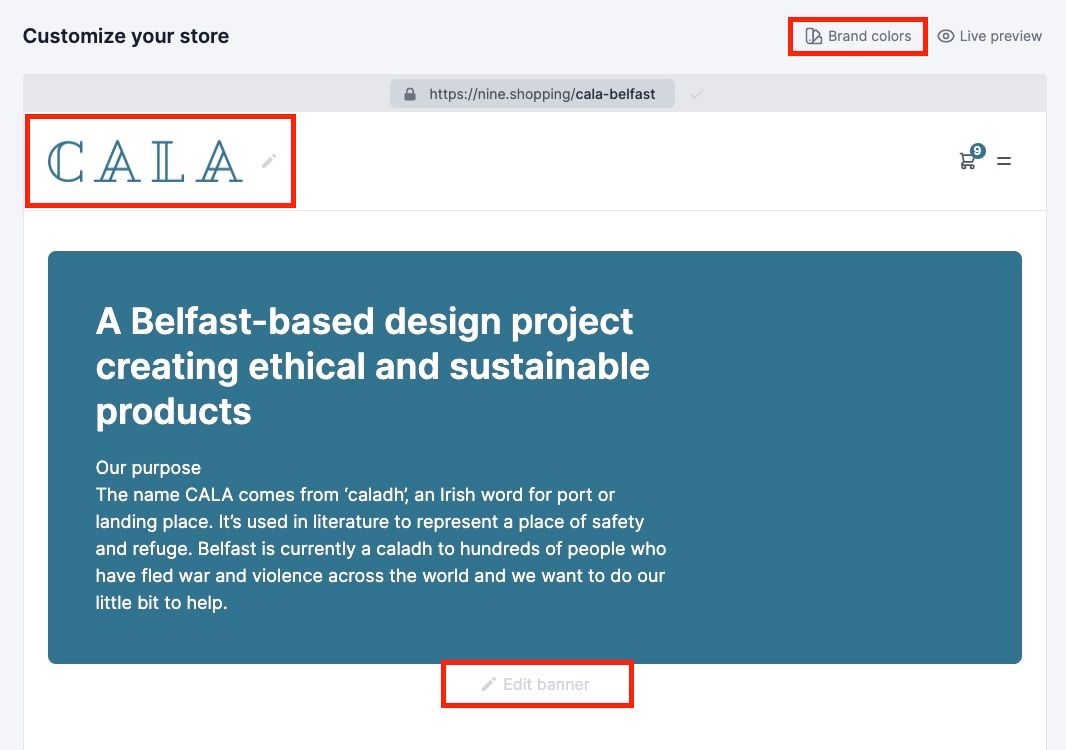
What’s brilliant about nine is that you don’t need to choose between countless different templates and designs. All you need to do is add your brand colours, a logo and some text.
Click to add the brand colours button and insert your colour code. For this, you can go to a colour code finder website, upload your logo and to make sure it matches with your logo. Choose a secondary colour for the buttons on your website and decide if the text on the buttons will be black or white
Click to upload your logo and the ‘edit banner’ button to add text.
Adding products
Nine is a visual store builder- which is great if, like me, you have no design bone in your body.
It really is so simple.
First of all, click add product and give it a name
Product info
Brand and Category
The 'brand' will just be your business name and ‘category’ is the type of product your selling.
This will help people find your store through searching for these keywords, so make sure that it’s accurate to what you’re selling!
Add a description
Time to sell your product with a stunning description of what it is, how it’s made, and why someone should buy it.

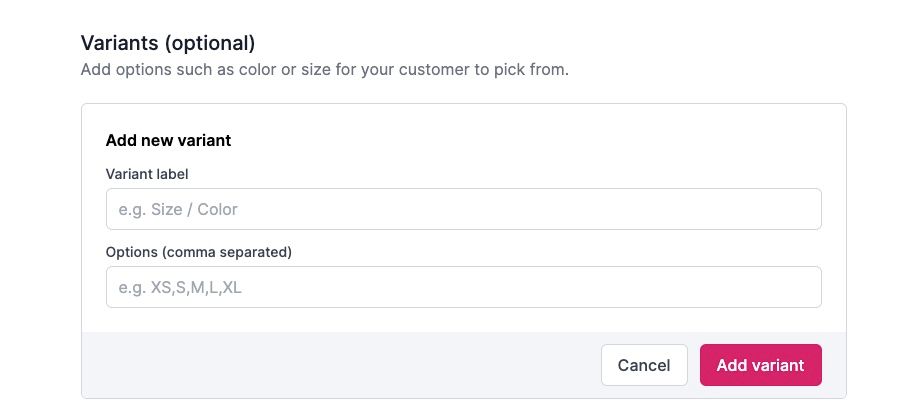
Add variants
Product variants are the different options your customers will have. This could be size, colour or anything you wish. It’s important to note that variants do not impact the price of the product- If you wish to add variations with different prices, you will need to add it as another product.
Add up to 2 variants.
Add a price
How much are you selling your product for?
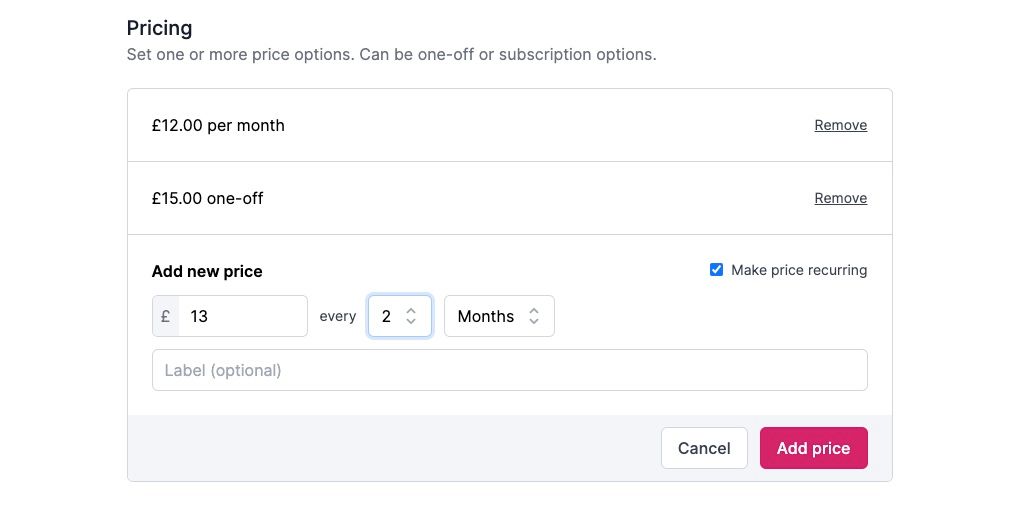
When adding a price, you will find a check box that will, once checked, turn the price into a subscription
You will then have the option to set a price for X quantities every Y months.
To give you a real-life example, imagine one of our coffee sellers was selling a bag of coffee beans on a one-off basis for $15.
They might want to incentivise their customers to subscribe to their coffee and set another price of $12 for 1 coffee bag every month.
This gives businesses (and their customers) so many options to experiment with subscriptions.
Connect with Stripe
If you’re not entirely sure what Stripe is, it’s basically a multi-billion dollar financial software company based in San Francisco.
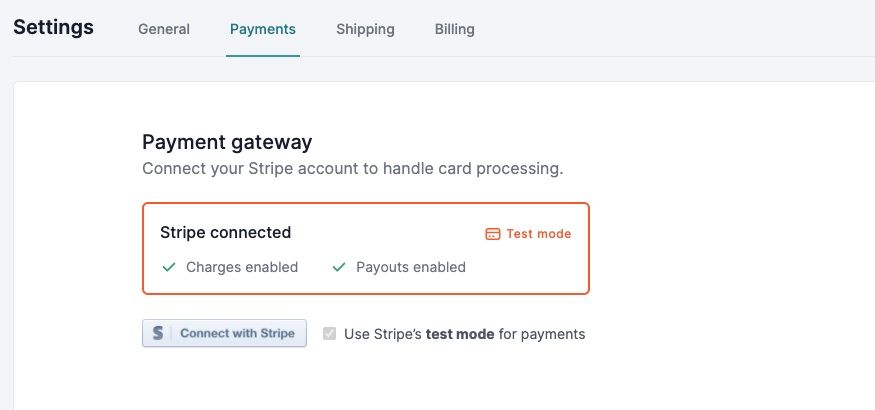
We use Stripe to process your payments because it is how secure it is. We know that with Stripe, your money is in good hands, and it keeps everyone as safe as possible.
You will be prompted to connect your Stripe account to your nine store.
Don’t have a stripe account?
No worries! All you need to do is click on the ‘connect with Stripe’ button and you will be set up within a few minutes.
Connect to social media
Make sure to connect your social media accounts. This will allow your customers to connect with you online and help build that relationship.
This could mean that even if they don’t purchase on this occasion, hopefully, they will follow you and make a purchase down the line.
In the ‘Edit Store’ tab, scroll right down to the bottom of the page, and there you will see the Instagram and Facebook logos. Click the ‘Edit social links’ button and add your links.
Launch your store
Once you have crossed the t’s and dotted the eyes, it’s time to hit the launch button to make your store go live.
Preview you’re page and make sure you’re happy with everything (You’ll still be able to edit your store after you go live).
Then Click the ‘Take my store live’ button, and then subscribe $9/month. You will then be asked to enter your card details and then you are ready to go.
Final Steps
Crack the champagne open to celebrate the launch of your sparkling brand new online store!
But that was the easy bit.
Now you need to share the link to your new store far and wide.
A good idea would be to create some hype on your own, and business social media pages, ask your friends and family to share it, run some giveaway competitions to spread the word.
If you have any questions at all, please don't hesitate to drop us an email on support@nine.shopping and we'll get back to you ASAP.